6 Amazing Passive Income Streams , Earn $10,000 Monthly

I will show you how to build your own online business empire, and set your real passive earning machine working 24 x 7 For You.
Non-members can read the post here
Stop Saving Pennies and Start Printing Freedom
I used to think being “responsible with money” meant clutching my debit card like a security blanket.
Save every dime, skip Starbucks, wait for retirement.
That’s what my parents drilled into me. But by my junior year at college, reality slapped me, I realised no matter how many $3 iced coffees I skipped, I wasn’t going to escape student debt, let alone build the kind of life I wanted.
So I did the unthinkable , I stopped obsessing over saving.
And started obsessing over multiplying.
The Mindset Flip , From “Can I afford this?” to “How can I afford this?”
When my roommate wanted to road-trip , my first thought was: “No way, I’m broke.” But instead of shutting it down, I asked, “What side hustle would cover gas money by next week?”
That shift sounds tiny.
But it’s the difference between standing still and hacking your way out of quicksand.
Most of us grew up with the idea:
- Work 40 years → Save in a bank → Retire someday.
But in 2025, that math doesn’t add up. Banks give you 0.4% interest, inflation eats the rest, and you end up broke-but-polite.
The new game isn’t about hoarding , it’s about circulation. Money is a tool, not a trophy.
The “Good Debt” Nobody Told You About
Debt scared me.
Credit cards, loans, even borrowing a few bucks from a friend , it all felt like failure.
But then I realized, billion-dollar companies run entirely on debt.
The trick? Use debt for leverage, not lifestyle.
- I used a 0% APR student credit card to buy a refurbished MacBook. That laptop let me freelance on Upwork and earn enough to pay the card off before interest kicked in.
- Friends are hacking “Buy Now, Pay Later” responsibly , grabbing equipment or tools to launch micro-businesses, not shopping sprees.
Debt isn’t the enemy, dumb debt is, and smart debt is an accelerator.
Outsourcing Saved My GPA (and My Sanity)
Ok…let me reveal one day around 1a.m., I was drowning in design homework and answering Etsy shop messages from buyers asking if their digital downloads “work on iPads.”
I almost quit.
Then a buddy whispered , “Dude, hire a VA.”
I laughed…. Me? A broke person, hiring help?
But I found a virtual assistant from the Philippines on Fiverr for $6/hour. She handled customer replies, order issues, even uploaded product listings.
Suddenly, I had hours back for other priorities, and my side hustle didn’t collapse.
Time is the one resource you never get back.
Outsource the noise so you can double down on the stuff that actually grows.
2025 Hacks That Work (Right Now)
- Cashback stacking: College students I know use Rakuten + credit card points + campus promo codes = free flights.
- AI side hustles: Tools like Jasper and Canva AI let you whip up sellable templates or eBooks in hours. (I sold my first Notion template in a weekend.)
- Freelance arbitrage: Pay $10 for a Fiverr gig, resell it polished for $100 on LinkedIn or to local businesses.
This isn’t just theory, these are real guys covering rent money with hacks the old “save every penny” mindset can’t even process.
The Lesson I Wish I Learned at 18
The old system told us to play safe, stack nickels, and pray for retirement. But freedom doesn’t come from fear. It comes from flipping the script , using money, time, and even debt as tools, not chains.
So here’s the choice , keep clipping coupons and waiting for “someday,” or start building a life where money works harder than you do.
How to Start a Dropshipping Business
So let me show you how to launch your own online store without stocking inventory.
You’ll learn how to pick products, build a shop, get customers, and fulfill orders in just a few clicks.
Materials Needed
- Laptop or smartphone with internet
- $30–$100 startup budget (for store + ads)
- A Shopify or WooCommerce account
- Access to supplier platforms (AliExpress, Spocket, SaleHoo, etc.)
- Optional: A little caffeine to keep your brain buzzing
Step 1: Pick a Product That Actually Sells
Let me tell you, this is the step that makes or breaks dropshipping. If the product is boring or overdone, nobody’s buying.
Look at platforms like AliExpress, Spocket, or even check trending TikTok products. You want something cheap to source (under $20) but easy to sell for 2–5x the price.
Example: Pet beds often cost $10 with shipping from a supplier, but you can sell them for $50 on your store. That’s a $40 margin every time.
Step 2: Check the Demand Before You Commit
Well what I mean to say here is , don’t just pick something because you like it. Test if real people actually want it.
Use Google Trends to see if people are searching for that product. Check Amazon’s best-sellers. Look at TikTok hashtags to see if influencers are hyping it.
Example: Search “portable blender” in Google Trends. If you see a rising line, that’s demand. If the line is flat or dropping, skip it.
Step 3: Choose a Supplier You Can Trust
Here’s the truth , your whole business depends on whether the supplier actually delivers. A bad supplier means refunds, complaints, and stress.
Start with AliExpress, Spocket, or SaleHoo.
Read reviews, check delivery times, and look at order counts, suppliers with thousands of fulfilled orders are usually safer.
Example: A supplier on AliExpress with 10,000+ sales and 4.8 stars is way better than one with 50 sales and no reviews.
Recommended Dropshipping Suppliers & Links
Let me tell you, picking a solid supplier saves you endless headaches.
Here are some of the most trusted ones you can check out:
- Spocket
- AliExpress
- Suppliersdata
- SaleHoo
- Doba
- Wholesale2B
- Worldwide Brands
- Wholesale Central
- Sunrise Wholesale
- MegaGoods
- InventorySource
- National Dropshippers
- Dropshipper.com
- OfficeCrave
Example: Start with Spocket if you want US/EU fast shipping, or AliExpress if you want the biggest product range at the lowest prices.
Step 4: Build Your Online Store
So here’s the fun part , setting up your digital shop. Don’t overthink it. Platforms like Shopify make this as simple as dragging and dropping.
You’ll need:
- A clean homepage with your product showcased
- Clear product descriptions (don’t copy/paste supplier text , rewrite in your own words)
- A payment gateway (PayPal, Stripe, or Shopify Payments)
Example: On Shopify, you can import products directly from AliExpress with apps like Oberlo (or DSers now). This lets you add the product to your store in seconds.
Step 5: Price Your Product Smartly
Well, don’t be greedy, but also don’t sell too cheap. Aim for at least 2–3x the cost price so you cover ads, fees, and still profit.
Example: Buy at $12, sell at $39. After ads and fees, you still pocket around $15–20.
Step 6: Run Simple Ads to Get Traffic
Let me tell you, without traffic, your store is just a ghost town. You need eyeballs on your product.
Start with Facebook Ads or TikTok Ads. Both are cheap and work great for impulse-buy products. Or, if you’re not into learning ads, hire a freelancer on Fiverr for a small budget.
Example: Run a TikTok ad showing a dog sleeping in your pet bed. People scroll, laugh, and boom , they click “buy.”
Step 7: Collect Your First Sale (and Celebrate)
Here’s the rush , the first time your phone dings with “New Order,” it feels unreal.
When someone buys, the money goes into your store account first. Then, you order the product from your supplier at the cheaper price.
The supplier ships it straight to your customer. You keep the profit difference.
Example: Customer pays you $50 → You pay supplier $12 → $38 stays in your pocket.
Step 8: Automate Order Fulfillment
Well what I mean here is , don’t waste your mornings typing in addresses one by one. Automation tools handle it.
If you’re on Shopify, use apps like DSers or Oberlo. One click sends the order to the supplier. They ship directly, and you don’t lift a finger.
Example: Wake up, click “Fulfill All Orders,” and sip your coffee while suppliers ship products for you.
Step 9: Keep Customers Happy
Listen, angry customers kill businesses faster than anything.
Answer emails, give tracking numbers, and solve problems quickly.
Example: If a customer asks, “Where’s my order?” , reply with their tracking link instead of ignoring them. That little gesture builds trust.
Step 10: Scale Up Once You’re Comfortable
So here’s the thing , once you’ve proven one product works, don’t stop there.
Add more products or spend more on ads.
Many dropshippers make $10k+ a month from just one winning product.
The trick is to reinvest profits into ads and maybe hire a virtual assistant to handle support.
Example: Your pet bed sells well → Next month, you add a matching pet blanket and bundle them. Sales double.
Tips
- Don’t overload yourself with too many products at first. One winner is enough.
- Shipping can be slow from some suppliers. Look for ones with local warehouses (US/EU).
- Test ads with small budgets ($5–10/day) before spending big.
- Keep your store design simple. Clutter kills sales.
- Always order a sample for yourself before selling. You need to see quality first.
My Advice
Look, dropshipping isn’t magic. You’re not going to make $10,000 overnight.
At first, you might lose money testing ads or pick a product that flops. That’s normal.
But here’s the real talk , if you stick with it, adjust when things fail, and learn from mistakes, you can build a business that runs almost on autopilot.
Imagine checking your phone at breakfast and seeing $200 in new sales that came while you slept.
It’s not easy, but it’s simple. And if you’re willing to put in a few hours upfront, this little side hustle can turn into the thing that pays your rent, your bills, or even your dream vacation.
Subscription Business Models
Part 1: Starting with Subscription Business Models
Step 1: Pick your subscription idea
Let me explain , Choose a product people will want regularly.
Think snacks, pet treats, household essentials, or cosmetics.
Example: A monthly coffee box delivered to customers’ doors.
Step 2: Decide on subscription frequency
Offer weekly, monthly, or quarterly subscriptions.
Predictable payments help you plan your revenue.
Example: A monthly dog treat box that ships automatically on the first of every month.
Step 3: Add subscriptions to an existing store or start a new one
If you already sell products, add a subscription option at checkout.
Or launch a store dedicated to subscriptions.
Example: A Shopify store offering one-time or monthly vitamin packs.
Step 4: Source your products
Find suppliers on Aliexpress, Alibaba, or local wholesalers.
Check reviews and shipping times for reliability.
Example: A 4.9-star-rated pet treat supplier on Aliexpress with fast shipping.
Step 5: Automate orders
Use plugins or apps to handle recurring payments and shipments.
Customers don’t have to reorder manually.
Example: WooCommerce Subscriptions schedules monthly delivery automatically.
Step 6: Market your subscription
Promote your product with social media, email lists, or ads targeting your audience.
Make subscribing irresistible.
Example: Instagram ad showing “Unbox a monthly surprise” for $29/month.
Why subscriptions work:
- Lower monthly costs attract more buyers
- Predictable, recurring revenue
- Minimal ongoing effort
Part 2: Amazon FBA , Selling Without Lifting a Finger
Step 1: Understand what FBA is
Amazon FBA (Fulfilled by Amazon) means you send your stock to Amazon.
They store, pack, ship, and handle customer service. You just sit back.
Example: Sell iPhone covers , Amazon ships them every time someone orders.
Step 2: Find best-selling products
Tools like Junglescout or Helium10 can help identify in-demand items with low competition.
You can also browse Amazon’s “Best Sellers.”
Example: Silicone phone covers selling 2,700 units/month with few competitors.
Step 3: Choose private labeling or reselling
Private labeling = branding your product for higher margins.
Reselling = selling existing products with no brand change.
Private labeling usually pays off more.
Example: Add your logo and custom packaging to silicone iPhone covers.
Step 4: Order stock and ship to Amazon
Buy your products and ship to an Amazon warehouse.
Freight forwarders can handle international shipping and paperwork.
Example: 50 silicone covers shipped from Alibaba directly to Amazon FBA.
Step 5: Create your Amazon listing
Add images, descriptions, and keywords that customers search for. Make it easy for buyers to find you.
Example: Listing title: “Premium Silicone iPhone Cover , Shockproof & Slim Design.”
Step 6: Let Amazon handle fulfillment
Amazon stores, packs, ships, and answers customer questions.
You get paid every 14 days minus fees.
Example: Selling 50 covers with $7 profit per unit nets $362 , automated.
Step 7: Restock when necessary
Keep enough stock to avoid running out. Plan for 6 months’ worth of inventory initially.
Example: Reorder 300 phone covers every six months.
Why FBA works:
- Amazon brings the customers to you
- Fully automated fulfillment and customer service
- Scalable with minimal effort
The Hidden Amazon Passive Income
Amazon’s quiet little program that pays ordinary people… and nobody’s talking about it.
How to Start a Print-on-Demand Business and Earn Passive Income
Turn your creative ideas into cash by selling custom products online , no inventory, no hassle.
Let me tell you, print-on-demand is like dropshipping’s artsy cousin.
You get to sell custom-designed products without holding stock, and the supplier handles shipping.
By the end of this guide, you’ll know how to set up your store, create designs, and start earning.
Materials Needed:
- Laptop or smartphone
- Internet connection
- Print-on-demand supplier account (see list below)
- eCommerce platform account (Shopify recommended: https://www.shopify.com)
- Design tool (free options like Canva: https://www.canva.com)
Step 1: Understand Print-on-Demand
So let me explain this first , print-on-demand is a way to sell custom products without stocking anything.
You either make the designs yourself or get them made, choose the products, and the supplier prints and ships them when someone buys.
Example: You design a quirky mug, someone orders it from your store, your supplier prints it and sends it to them. You never touch the mug.
Step 2: Pick Your Products
Well, what I mean to say here is that choosing the right product is everything.
You can sell T-shirts, mugs, phone cases, homeware, pet products , you name it. Check what’s trending, what’s unique, and what people want.
Example: Browse Amazon’s bestsellers (https://www.amazon.com/bestsellers), Etsy’s trending items
(https://www.etsy.com/c/trending), or use Google Trends
(https://trends.google.com) to see what people search for.
Recommended Print-on-Demand Suppliers:
Step 3: Create Your Store
Let me tell you, your store is like your shop’s personality. Shopify is easy to set up.
Pick a catchy brand name, choose your store’s look, and organize your products neatly.
If design isn’t your thing, freelancers can handle it for you.
Example: Hire someone on Fiverr (https://www.fiverr.com) to make a simple logo or banner for $5–$10.
Step 4: Connect Your Print-on-Demand Supplier
So here’s the thing , you need your supplier to work with your store. Most of the popular ones integrate seamlessly with Shopify.
Check product costs, shipping times, and countries they ship to. Follow the integration guide provided by the supplier.
Example: If using Printful (https://www.printful.com/integrations/shopify), connect it to Shopify with a few clicks, and your products auto-sync.
Step 5: Get Creative With Designs
Well, now comes the fun part. Your designs are what make your store stand out. Be unique, playful, or trendy.
Use free tools like Canva (https://www.canva.com), or pay a freelancer to create something eye-catching. You don’t need expensive software to look professional.
Example: Design a motivational T-shirt graphic using Canva’s ready-made templates and tweak colors and fonts.
Step 6: Price Your Products
Let me explain this , pricing matters. Factor in the supplier’s cost, shipping, and your profit margin.
Don’t overprice, but don’t sell yourself short. You want it fair for customers and profitable for you.
Example: If a mug costs $5 from your supplier, price it at $15 to cover fees and earn $10 per sale.
Step 7: Launch and Promote Your Store
So here’s the thing , your store is live, but no one knows about it yet. Share your products on social media, run small ads, or use email marketing.
The more people see your designs, the better your chances of sales.
Example: Post an Instagram reel showing your mugs in action, linking directly to your store.
Step 8: Automate Orders and Fulfillment
Well what I mean to say here is, once your store is set up with a supplier, orders are mostly automatic. Your supplier prints, packs, and ships while you monitor sales and tweak designs.
Example: Someone orders a T-shirt, Printful prints it and sends it, Shopify updates the order status automatically.
Step 9: Analyze and Improve
Let me tell you, success isn’t instant. Watch what sells and what doesn’t. Remove slow-moving items and test new designs. Small improvements add up over time.
Example: If cat-themed mugs sell more than dog-themed ones, create more cat designs and promote them.
Step 10: Add Extra Revenue Streams
So let me explain , you can earn more with subscriptions, bundles, or limited editions. Think of it as giving your best customers more reasons to buy repeatedly.
Example: Offer a “monthly mug subscription” where customers get a new quirky design every month.
Benefits of Print-on-Demand
- Let me tell you, you get creative freedom and fun
- No big startup costs or inventory worries
- Quick to set up; start earning fast
- Can run anywhere with internet
- Flexible time commitment (10–15 minutes per day)
- Potential income: $0 to $500k+ per month
Tips
- Outsource designs if overwhelmed; Fiverr (https://www.fiverr.com) or Upwork (https://www.upwork.com) are cheap and fast
- Keep an eye on trending products; what’s hot now may cool later
- Don’t neglect product descriptions , they help with search visibility
- Always test your products’ shipping speed and quality
My Advice
Well what I mean to say here is, it’s okay if the first few designs don’t sell. Keep experimenting and tweaking.
Success in print-on-demand grows slowly but steadily.
Your creativity pays off, and every sale is proof that your ideas matter.
Stick with it, learn from each step, and you’ll build a business that’s uniquely yours.
How to Start Affiliate Marketing and Make Passive Income
Well, let me explain , affiliate marketing is basically getting paid to promote other people’s products.
You don’t need to create anything yourself, yet you can earn a steady income.
Materials Needed:
- A laptop or smartphone
- Internet connection
- Existing website, blog, or social media account (optional, but helpful)
- Email account for campaigns
- A notebook or tool to track links and earnings
Step 1: Understand Affiliate Marketing
Start by getting clear on what affiliate marketing is.
Think of it like recommending a product to a friend , you get a cut of the sale when they buy it.
This helps businesses sell more, and you make money without touching inventory.
Example: Chef Luigi talks about a food processor in his cooking videos. Viewers buy it through his link, and he earns a percentage.
Step 2: Find Affiliate Programs
Next, you need to pick programs to join.
These are platforms or companies that let you earn a commission for referrals.
Some are marketplaces with multiple brands, others are company-specific programs.
Example: Check out Clickbank.com, Shareasale.com, or CJ.com to start browsing offers in your niche.
Step 3: Choose Offers to Promote
Pick products that fit your niche or audience.
If you already have followers, stick to products they’ll care about.
If you don’t have an audience yet, pick a niche that interests you , you’ll grow an audience faster if your content and products align.
Example: A food blogger can promote meal kits or cookware, but beauty products won’t connect with their audience.
Step 4: Get Your Affiliate Links
Once you choose offers, get the special link that tracks your sales.
Without this, the company won’t know it’s your referral, and you won’t earn a commission.
Keep a list of all your links somewhere safe.
Example: Chef Luigi copies the link for the food processor and pastes it into his YouTube description and blog posts.
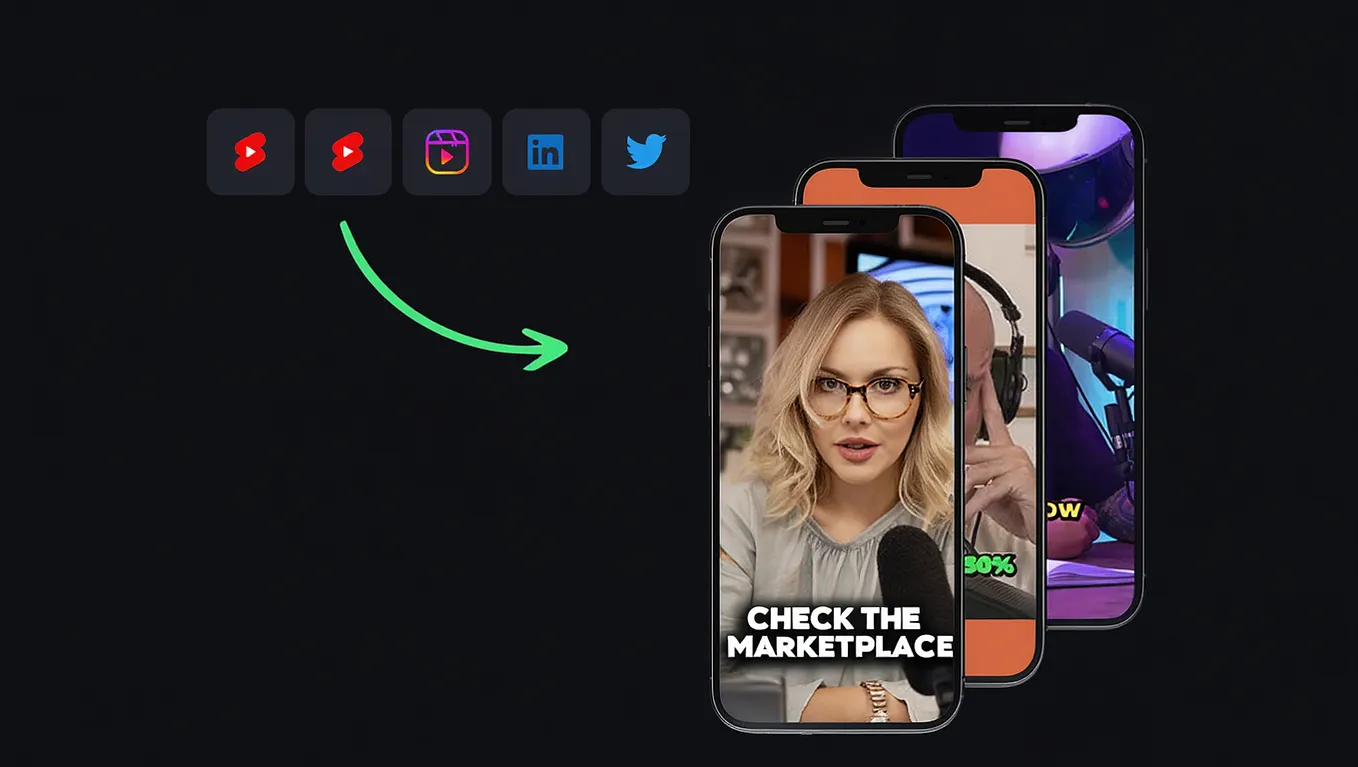
Create 300 Short Videos in One Sitting , Without Showing Your Face
Step 5: Share Your Links
Now, it’s time to spread the word.
Post links in blogs, videos, emails, or social media posts.
Make it helpful, not pushy. Show people how the product solves their problem. Use discount codes or promotions to make it irresistible.
Example: Create a quick how-to video using a product and share the link with your audience.
Step 6: Track Sales and Get Paid
After sharing, watch the sales roll in.
Most programs pay monthly or after reaching a minimum threshold. Rates vary , some are a flat fee, others are a percentage of the sale.
Example: You earn 10% for every course purchased through your link. If someone buys a $50 course, you get $5.
Step 7: Scale Your Income
Once you see results, expand your efforts.
Add more products, post more content, or use paid advertising.
You don’t need a huge team , affiliate marketing scales easily with effort, not overhead.
Example: Add another related product like a kitchen knife set or online cooking class to increase revenue.
Step 8: Explore Online Courses
Affiliate marketing pairs well with online courses.
Get Hustle Circuit’s stories in your inbox
Join Medium for free to get updates from this writer.
Creating courses is easier than you think , people pay for step-by-step guidance that saves them time and confusion.
Courses can complement the products you promote.
Example: Offer a small course on meal prep techniques and link to affiliate tools in the lessons.
Step 9: Keep Learning and Improving
The online space changes fast, so stay curious.
Try new platforms, test what content works, and track what drives sales. Small tweaks can make a big difference over time.
Example: Swap a low-performing Instagram post for a tutorial video , sometimes video converts better.
Step 10: Enjoy Passive Income
Finally, watch your efforts pay off.
With consistent work, your links can earn money even while you sleep.
That’s the beauty of affiliate marketing , work once, earn repeatedly.
Example: A blog post about cooking tips continues generating clicks and sales for months after publishing.
Popular Affiliate Networks:
- Avantlink.com
- Clickbank.com
- Affiliatefuture.com
- Linkconnector.com
- CJ.com
- Revenuewire.com
- Flexoffers.com
- Shareasale.com
Benefits of Affiliate Marketing
- No product creation needed
- Zero capital required
- Very low risk
- Start earning instantly
- Can run from anywhere
- Potential income: $0–$200k+ per month
- Only 5 minutes a day can make a difference
Tips
- Start with products you already use or love
- Keep links organized in a spreadsheet
- Track conversions to see what works
- Avoid promoting unrelated products , trust matters
- Make content helpful, not spammy
Find Top ClickBank Affiliate Programs
My Advice
Well, what I mean to say here is…don’t expect instant riches. It takes some trial and error.
But the effort is tiny compared to creating your own products.
Stick with it.
Test, adjust, and keep sharing. The more value you give, the more your income grows.
And trust me, seeing those first commissions hit your account? That’s addictive in the best way.
How to Create and Sell Online Courses for Passive Income
So here’s the thing , millions of people are buying online courses every day. They want step-by-step guidance, not endless scrolling through free content that confuses them.
I’ll show you exactly how to create an online course from scratch, get students, and start earning passive income.
Materials Needed:
- A computer or smartphone
- Internet access
- Free or cheap tools for video/audio recording (smartphone camera, Zoom, or OBS)
- A platform to host your course (Thinkific, Kajabi, Shopify, etc.)
- Optional: Freelancers for outsourcing content creation
Step 1: Pick What You Want to Teach
Well what I mean to say here is… you need a topic people actually want to learn.
Think about your skills, hobbies, or work experience.
Example: If you bake cakes, you could teach “10 Advanced Cake Decorating Techniques.”
Why this matters: Picking a topic you love keeps you motivated, and picking one people want ensures they’ll buy it.
Step 2: Make a List of Interests and Skills
Let me tell you, it’s easier than it sounds. Write down 10–20 things you like doing and what you’re good at.
Then, see which ones overlap with your skills. That’s your sweet spot.
Example: Love photography + know Lightroom editing? Make a course on photo editing for beginners.
Step 3: Identify Your Target Audience
So here’s the tricky part , just because you like it doesn’t mean everyone does.
Narrow your focus. Who exactly will benefit from your course?
Example: A “Beginner Lightroom Editing” course is for amateur photographers, not professional editors.
Why this matters: A clear audience makes marketing easier and more effective.
Step 4: Validate Demand
Well what I mean to say here is… check if people will actually pay for your course.
Look at competitors, Amazon bestsellers, YouTube tutorials, podcasts, and online communities.
Example: Search for “Lightroom online course” on Google. If others sell similar courses successfully, there’s demand.
Step 5: Create Your Course Outline
So let me explain… a good course has a clear structure. Start with a title, then map out lessons in order.
Break each lesson into simple steps.
Example:
- Introduction to Lightroom
- Basic Adjustments
- Color Grading
- Exporting and Sharing
Why this matters: A clear outline keeps students engaged and makes recording easier.
Step 6: Produce Your Course Content
Let me tell you, this is where it gets fun. Decide if you want video, text, audio, or all three. Video usually works best for teaching online.
Example: Record a 10-minute video showing how to adjust brightness and contrast in Lightroom.
Tips: Use your phone camera, no need for fancy equipment or hire a freelancer if you want polished content.
Step 7: Set Up Your Course Platform
So here’s the thing… you need a place for students to access your course. Platforms like Thinkific, Kajabi, or Shopify apps make it simple.
Example: Upload your videos to Thinkific, add lesson titles, and organize them in order.
Why this matters: A smooth platform makes learning easy and keeps students happy.
Step 8: Build a Community
Well what I mean to say here is… interaction helps students stay engaged. Create a members-only Facebook group or forum.
Example: Students can ask questions and share their Lightroom edits.
Benefits: Students help each other, reducing the time you spend answering questions.
Step 9: Test Your Course
Let me tell you… before you go live, check the course as a student. Look for confusing parts, broken links, or missing instructions.
Example: Ask a friend to complete Lesson 1 and give feedback.
Why this matters: A smooth experience increases satisfaction and reduces refunds.
Step 10: Set Your Pricing
So here’s the thing… pricing affects how many people buy your course.
Research competitors and see what works.
You can also offer early-bird discounts or bundles.
Example: Price your Lightroom course at $49, but offer $39 for the first 50 sign-ups.
Step 11: Promote Your Course
Let me explain… even the best course won’t sell if no one knows about it. Use social media, email marketing, paid ads, and your website.
Highlight success stories and outcomes.
Example: Share a before-and-after photo edit from a student on Instagram.
Step 12: Provide Ongoing Support
Well what I mean to say here is… students will have questions. Make a FAQ section, host monthly Q&A webinars, or hire a moderator.
Example: Assign a top student to answer questions in the Facebook group.
Why this matters: Support builds trust and keeps students engaged.
Step 13: Scale for Passive Income
Let me tell you… once your course works, you can sell it again and again.
Repurpose content, create bundles, or launch advanced courses.
Example: Offer a “Lightroom Masterclass” for students who finish the beginner course.
Benefits You’ll Get
- Let me explain… easy-to-use platforms simplify creation
- Sell courses worldwide, anytime
- Create a passive income stream
- Complement other products or services
- Start with $0 investment
- Earning potential: $0–$50,000+ per month, sometimes $10,0000+
Tips
- Start simple; don’t overcomplicate videos or slides
- Focus on a niche audience, not everyone
- Engage students via a group for peer support
- Repurpose content to save time and increase sales
- Outsource repetitive tasks if you want more free time
My Advice
So here’s the thing… building an online course isn’t instant money, you’ll need effort, patience, and trial-and-error.
But the payoff? Students learning from you, a product that keeps selling while you sleep, and a chance to turn knowledge into income.
Keep going, refine your content, and trust the process , you’ll get there.
Resources and Tools:
How to Start Earning Passive Income with Real Estate Crowdfunding
Make your money work for you in real estate , even if you don’t have thousands lying around.
Let me tell you, real estate doesn’t have to be scary or out of reach.
With crowdfunding, you can invest small amounts of money into big real estate deals, and start earning passive income without the usual headaches.
Materials Needed:
- A computer or smartphone
- Internet connection
- Minimum investment amount (usually $500+)
- A verified account on a crowdfunding platform
Step 1: Understand What Crowdfunding Is
So here’s the thing, crowdfunding is simply pooling money together with other people to invest in something bigger than you could do alone.
Example: Ten people put in $500 each, and together they buy a $5,000 property investment.
Crowdfunding lets small-time investors fund large projects without needing millions upfront. Think of it as a team effort for your wallet.
Step 2: Learn the Types of Real Estate Investments
Well, what I mean to say here is there are two main ways to invest in real estate crowdfunding: equity and loans.
- Equity Investments: You own a share of the property and earn part of the rent and the property’s eventual sale.
Example: Invest $500 in an apartment building, and get a portion of rental income every month.
- Secured Loans: You lend money like a bank, and earn fixed interest while the property secures your investment.
Example: Loan $500 to a project, and get a fixed 8% annual interest, paid monthly.
Equity can swing higher or lower in income, while loans give consistent payouts. Choose based on your comfort with risk.
Step 3: Set Your Investment Goals
Let me explain, first figure out how much money you can afford to invest without stressing out your budget.
Example: If you can spare $1,000, maybe split it into two $500 investments for diversification.
Also, consider how long your money will be tied up , some deals need 12 months, others 3–5 years. Knowing this helps you plan your cash flow.
Step 4: Choose a Crowdfunding Platform
Well, you don’t need to knock on doors anymore. The internet brings all the deals to you.
Here’s a list of popular platforms (click to check them out):
- Fundrise.com , Invest $500+
- Diversyfund.com , Invest $500+
- Crowdstreet.com , Invest $1,000+
- Peerstreet.com , Invest $1,000+
- Realtymogul.com , Invest $5,000+
- Patchofland.com , Invest $5,000+
- Prodigynetwork.com , Invest $10,000+
- Realcrowd.com , Invest $25,000+
Example: Open Fundrise, register an account, and browse deals under $500 minimum.
Each platform curates deals for you, so you don’t have to spend hours analyzing every property.
Step 5: Browse Deals and Analyze Options
So here’s the deal: scroll through the deals and look for a match with your budget and risk level.
Example: A $500 equity investment in a rental property promising 10% annual return paid quarterly.
Check the minimum investment, term length, and expected returns. Ask questions if anything is unclear , the platform support teams exist for this.
Step 6: Pick Your Investment Type
Let me tell you, decide whether you want to invest in equity or loans. Think of it as picking a roller coaster, one swings a lot, the other is steady.
Example: Choose a secured loan for consistent monthly interest, or equity if you want higher potential profits and don’t mind waiting longer.
Remember, you can mix both types across different deals to balance risk and reward.
Step 7: Make Your Investment
Well, this part is simple. Click “Invest” and follow the platform’s secure payment process.
Example: Transfer $500 via the platform’s dashboard, sign the online legal agreements, and you’re officially an investor.
No need to handle tenants, repairs, or late-night emergencies , your money works quietly for you.
Step 8: Track Your Returns
Let me explain, every platform has an online dashboard showing how your investments are performing.
Example: Log in to Fundrise, check the quarterly rental income, and see your portfolio’s value.
You can reinvest earnings to grow your portfolio, or keep the cash flowing in your account. It’s truly passive income.
Step 9: Diversify to Reduce Risk
Well what I mean to say here is don’t put all your money into one property. Spread it across different deals, property types, or platforms.
Example: $500 in a commercial building, $500 in a residential rental.
Diversification limits risk while giving you multiple income streams. Think of it like not putting all your eggs in one basket.
Step 10: Reinvest and Grow Over Time
So let me explain, the magic of compounding works here too. Reinvest your returns into new deals to steadily grow your passive income.
Example: Earn $50 in interest from a loan, reinvest it into another property, and watch your income snowball over time.
Crowdfunding allows you to scale without extra work , just your money doing the heavy lifting.
Benefits of Real Estate Crowdfunding
- Start small: invest $500+
- Passive income: earn without landlord headaches
- Diversification: invest in multiple property types
- Higher potential returns than savings accounts
- Less risk than owning property alone
Example: 12% average annual return on small investments, compared to 2% in a savings account.
Tips
- Only invest money you can afford to leave tied up for months or years
- Read all deal documents carefully
- Ask questions to the platform before investing
- Reinvest to grow your portfolio gradually
- Diversify across property types and platforms
My Advice
Let me tell you, starting small is perfectly fine. You don’t need millions to begin building wealth.
Well, what I mean to say here is real estate crowdfunding is your ticket to passive income without stress.
It takes patience, but every small investment compounds over time.
Keep going, track your progress, and reinvest smartly.
Soon, you could have multiple income streams quietly growing while you focus on life.
How to Make Passive Income Using eToro Copy Trading
Want to grow your money without spending hours analyzing stocks? Let me show you a way to piggyback on expert traders.
So here’s the thing, investing in stocks, crypto, and shares can feel like stepping into a jungle without a map.
It’s confusing, risky, and overwhelming if you’re new.
But there’s a way to benefit from the expertise of successful traders without spending months learning the market yourself.
Materials Needed:
- A computer, tablet, or smartphone
- Internet access
- $200+ to start investing
- An eToro account: https://www.etoro.com
Step 1: Create Your eToro Account
Well, let me explain, this is easy and fast.
- Go to eToro.com.
- Click Join Now and fill in your details.
- Verify your identity using the prompts.
Example: Think of it like signing up for any social app. You just need an email and a password, and you’re in.
Step 2: Deposit Funds
So here’s the part where you put some skin in the game, but don’t panic.
- Log into your account.
- Click Deposit Funds.
- Choose your preferred payment method and add $200 or more.
Example: If you deposit $500, that’s the cash you’ll use to copy traders. It’s like topping up a game account, you only spend what you’re comfortable with.
Step 3: Explore Copy Trading
Let me tell you, this is where it gets interesting.
- Go to the Copy People tab.
- Check the Editor’s Choice section to see top traders.
- Use filters to sort by risk score, gains, or strategy type.
- Read their profiles, stats, and posts carefully.
Example: A trader with a 2/10 risk score and 50% yearly gain might be a good match if you want steady growth with low risk.
Step 4: Analyze Traders
Well what I mean to say here is, don’t just copy blindly.
- Look at past performance graphs.
- Check minimum copy amounts.
- Compare risk scores (1 = low risk, 10 = high risk).
Example: If a trader suggests a minimum copy of $500, don’t start with $50, you won’t get the same results.
Step 5: Copy Your First Trader
So here’s the exciting part, putting theory into action.
- Choose a trader from your watchlist.
- Click Copy.
- Enter the amount to invest.
- Tick Copy Open Trades so you replicate existing positions.
- Confirm.
Example: You invest $200, the trader earns 30% in gains, and you make $60 automatically.
Step 6: Monitor Your Portfolio
Let me explain, you don’t need to babysit this all day.
- Click on Portfolio to see your investments.
- Track net profits and losses.
- Leave your investments for the suggested period unless you need to withdraw.
Example: If you copied three traders, your Portfolio tab shows how much each one is earning for you in real-time.
Step 7: Withdraw Funds When Ready
Well, here’s the thing, flexibility matters.
- Go to Withdraw Funds.
- Enter the amount to withdraw.
- Confirm and wait for the money in your account.
Example: If your $500 grew to $650, you can withdraw the $150 profit while leaving the rest invested.
Step 8: Explore CopyPortfolios (Optional)
Let me tell you, this is for when you want bigger-scale investing.
- Check CopyPortfolios in your dashboard.
- Minimum investment: $5,000.
- Choose between Top Trader Portfolios (best traders bundled) or Market Portfolios (stocks, ETFs, commodities).
Example: CopyPortfolios is like buying a mixed basket of stocks curated by experts instead of picking individual traders.
Step 9: Understand the Benefits
Well what I mean to say here is, this isn’t just about copying someone else, it’s about learning too.
- Diversify your portfolio without spending hours researching
- No financial market experience needed
- Leverage others’ success
- Learn trading skills passively
- No management fees
- Start with just $200
- Time commitment: 5 minutes per day
Example: You could copy a trader for a few weeks and start noticing patterns in how professionals make decisions.
Step 10: Take Action Now
Let me be blunt, knowledge is nothing without action.
- Pick one strategy today, don’t wait.
- Invest step by step, even in small amounts.
- Accept that failure is part of learning.
Example: Investing $1,000 across two traders and watching it grow month by month beats sitting on the sidelines, wishing you’d started sooner.
Tips
- Always check the risk score before copying
- Diversify between 1–3 traders at first
- Past performance does not guarantee future results
- Start small, scale gradually
- Research your traders’ strategies and portfolios regularly
Actionable URLs:
- eToro Main Page: https://www.etoro.com
- eToro Copy People: https://www.etoro.com/copy-people
- eToro CopyPortfolios: https://www.etoro.com/copy-portfolios
Wrapping Up
Start small, automate where possible, focus on one model until it works.
Passive income compounds over time , your future self will thank you.
Let me remind you again that only action puts you ahead of 99% of people. Success is the only outcome of a process that starts from taking action.
Without action, it is impossible to attain success.
Taking action every day to achieve your goals sets you on the path to achieving success.
“You don’t have to be great to start, but you do have to start to be great.”
, Zig Ziglar
Enjoyed this post? Drop a comment or hit the follow button , I’d love to hear your thoughts and keep sharing more money-making ideas. In case your are little more generous then do buy me a coffee.